Showing posts with label seasonal. Show all posts

Sunday, January 15, 2012

Sweet Sweet Potatoes

There just aren't any good cheesy titles for this. Time for another easy side dish (yes, I'm still riding on the coattails of the holiday dinner; last time, swear!).  This one happens to be my favorite, and being the wierdo that I am, I mix it with practically everything at the holiday meal.  You guessed it: Sweet Potato Casserole! (What's that? You didn't guess?) This recipe takes a sweet potato and turns it into a delicious (read, unhealthy) bit of decadence.  But seriously, despite all that butter and sugar, a serving of this goes a long way; once that casserole is divided 20 ways the impact is slight. As for the origins of this recipe, it's all mine; I made it up by experimenting and adding the basics until I was pleased with the results (the most fun kind of cooking).

What You'll Need
Supplies
Dining plate                                                                Mixing spoon
Dining fork                                                                  Measuring cups
Knife for chopping                                                       Measuring spoons
Cutting board                                                              13 x 9" casserole dish
Large mixing bowl
Ingredients
7 sweet potatoes                                                          2 tsp vanilla
1 3/4 cup brown sugar                                               1 cup pecans
1 cup nonfat milk                                                         Mini-marshmallows
1 cup butter 

Now Let's Make Sweet Potato Casserole!
As usual, begin with your prep work.  Preheat the oven to 350F. Using your knife and cutting board, chop up enough pecans to measure out about 1 cup. Since this is for the topping, and it's a relatively rustic dish, there's no need to be super precise here; if you're over or under it won't matter. 

This recipe calls for violence
On to the sweet potatoes!  I try to pick potatoes that are medium-largish.  You don't want really small ones as there won't be enough potato, but you don't want huge ones that take forever to cook, either. Begin by giving the potatoes a decent rinse. We won't be using the skins, so they don't have to sparkle, but excess dirt can transfer from your hands to the inside as you handle the potato (Blegh!). Use your fork to stab each side of the potato to help release air (Apparently, potatoes can explode if you skip this step, but I've never tested that. Really). Try not to look too demented as your stabbing the potatoes.  Place 2-3 potatoes on your dinner plate and microwave for 8 minutes. Poke with the fork to see if they're done; there should be no hard places.  Repeat until all the potatoes are cooked (I do this as I do the skinning step below).

Peeling (probably cursing)
As your other potatoes cook, begin skinning the potatoes that just finished.  Slice the potatoes in half and let them sit for a couple minutes to cool a bit (Not waiting = curses and burnt fingers).  When ready, begin removing the outer skin from the potatoes.  You can do this any way that works for you.  I tend to squeeze the potato a bit and the peel with my fingers and occasionally a knife for stubborn pieces. Place the sweet potatoes in your large mixing bowl as you go and set the skins aside for composting (or weird dogs that like potato skins, as mine do). Repeat for all the potatoes.

When all of your potatoes are in your mixing bowl, take the fork and mash them up really good.  Make sure not to leave behind any large lumps as this will affect the texture of your casserole. Once mashed, we can begin adding the other ingredients. Measure out 1 3/4 cup of brown sugar, packing it into the measuring cup as you do so; dump this into the mixing bowl. Then measure 1 cup nonfat milk and pour it into the mixing bowl. Microwave the 1 cup (2 sticks) of butter until it has begun to melt and pour this into the mixing bowl.  Measure out 2 tsp of vanilla extract and add to the sweet potato concoction (thought I was going to say mixing bowl, didn't you?).  Using your mixing spoon, blend all the ingredients together until everything is well mixed.  You shouldn't be able to distinguish any one ingredient except for the sweet potatoes by the time you're done.


Spoon the sweet potato mixture into the 13 x 9 inch casserole dish, spreading it out evenly.  Sprinkle your chopped pecans over the top of the casserole until you have an even layer. Do the same with the mini-marshmallows.  I typically use about 4 handfuls of marshmallows, but you're welcome to add as many or as few as you'd like. 

The finished product. Note the marshmallow's color.
Bake the casserole at 350F for about 30-45 minutes.  Cooking time varies drastically depending on the oven and the position of the casserole inside the oven. Just watch the casserole as you cook and remove it when the marshmallows have browned. Do NOT overcook; marshmallows are flammable (thankfully not something I learned from experience)! Serve casserole as a side dish to accompany you're favorite meal.  I find that it goes well with both pork and poultry. 


Sunday, December 4, 2011

Gobble Gobble

So what do you do with all those Thanksgiving leftovers (other than gorge yourself, of course)? While most of the leftovers are long gone by now in my family, there always seems to be a disproportionate amount of turkey still laying around.  Thus, every year Thanksgiving is followed by Turkey Pot Pie.  Really, this is a pretty versatile recipe and you can stretch any poultry leftovers this way.  I really think my family looks forward to this dinner almost as much as our Thanksgiving feast. Also, did you know that you can click on the photos in my blog to enlarge them? (Just saying...)

What You'll Need
Supplies
2 glass pie plates                                                          Can opener
Large mixing bowl                                                        Butter knife
Mixing spoon                                                                 Kitchen scale (optional)
Ingredients
4 pie crusts                                                                    1 can green peas
1 can cream of celery soup                                            2 tsp minced garlic
1 lb. leftover turkey                                                       Rosemary
1 can whole-kernel corn                                                Marjoram
1 can french-cut green beans                                        Salt and pepper

Now Let's Make Turkey Pot Pie!
To start, preheat your oven to 375F.  Open all your cans of vegetables and drain them.  (Do not try to drain the cream of celery soup - accidentally or intentionally). Set the cans aside.  If you're using whole garlic, mince two cloves to equal about two teaspoons of garlic.  Set this aside as well.

Put 1 crust in each of your two pie plates (two crusts = two pie plates). Press the crust down into the plate, so that it is fitted to the sides and bottom of the glass.  Trim any excess pie crust from the pie, using your butter knife.  Cut the crust right at the edge of the glass; there should be no crust hanging out of the pie plate by the time your done.  This isn't really a necessary step, if you'd prefer to do a decorative crust, instead, but it does significantly trim the amount of fat and calories in the recipe. (And, let's face it, after Thanksgiving we need all the help we can get). Once you've trimmed both crusts, set them aside.


Veggies!
In your large mixing bowl, combine the drained vegetables, garlic, and cream of celery soup.  Stir it together until the vegetables are well dispersed and thoroughly coated with cream of celery soup. (You can also cut a few calories here if you're really concerned by using Campbell's 98% fat free soup). This will create a fairly thick vegetable mixture. As you're mixing, be careful not to overdo it and squish all the veggies; they should be distinguishable (we're not making a mash here)

Gobble... gobble?
Take your leftover turkey meat and begin pulling it apart so that it is in large shredded pieces. Measure out 1 pound (16 ounces) of meat. This is where your kitchen scale will come in handy, because 1 lb. really is the perfect amount, but if you don't own a kitchen scale, don't stress it.  Just eyeball it (isn't that a tasty expression; totally appropriate for a cooking blog) and measure as closely as you can.  When you're measuring out your meat, try to get as much white meat as you can, since dark meat will make for a much gamier pie (unless you go for that sort of flavor). Also, do not let any bones or skin get in with the meat you plan to add.  Bones obviously pose a danger, and getting a hunk of turkey skin when you think you're getting meat is nasty (or gag-worthy, as the case was may be)

Once you've got your meat parceled out, add it to the vegetable mixture and stir it in. Add marjoram, rosemary, salt and pepper to taste.  I usually add about 1 1/2 Tbsp marjoram and 3/4 Tbsp rosemary, but I typically just throw it in on instinct, so it's hard to give a precise measurement.  Again, make sure that you thoroughly mix everything together.  Divide the mixture evenly between the two pie shells.  Spread the filling into all corners of the pie crusts, but if it's very full try to pile the larger amount in the center of the pie.


Top each pie with your remaining pie crusts. Firmly press the top crusts against the edges of the bottom crust using your fingers in order to seal the edges together. Work your way around the pie, until the edges are completely sealed.  Trim off all excess pie crust.  To finish the sealing process (and to make it purty) press a fork along the edges, working your way all the way around the pie.


Use your butter knife to poke holes in the top of the pie crust in order to release any steam or air that might build up as the pie cooks.  Try to do this in some pattern to increase the decorative effect.  Bake the pie at 375F for about 35-40 minutes, until the top crust is golden brown with no raw spots (raw spots look a little translucent compared to other areas of the crust). Remove the pies from the oven and let cool for 10-15 minutes (or as long as you can stand to wait).


Turkey Pot Pie with Gravy
A serving size is about a quarter of a pie. It pairs nicely with salad or other Thanksgiving leftovers.  I like to top mine with a little shredded cheddar cheese, but it's also delicious with a little leftover gravy. (This picture is sponsored by my Da, who had to wait to eat not-so-patiently as I got the shot just right).


Sunday, November 27, 2011

Turkey Day Gorging Part I

As you might have guessed, I cook Thanksgiving dinner in my family.  I love making huge feasts, setting the table with nice stuff and generally enjoying a big family meal.  Oh and the holiday magazines!  I love trying out recipes from magazines (and, you know, using my family as guinea pigs).  Today's featured recipe came out of said holiday magazine (okay, so technically it was on their website!): Grandma Erma's Spirited Cranberry Sauce, submitted by Leslie Sutherland of Fort Worth Texas to Southern Living.  I have long hated cranberry sauce (glaring at the previously canned blob from across the table each Thanksgiving) and been puzzled as to why it was a Thanksgiving staple.  Last year, I wanted to make some from scratch but was talked out of it after being told what a pain in the patootie it was.  This year I stuck to my guns, did my research and found Grandma Erma's delicious cranberry sauce, which is exceedingly nom-worthy.

What You'll Need
Supplies
3 quart saucepan                                                        Blender or Food Processor
Stirring spoon                                                             Air tight storage container
Measuring cups
Ingredients
4 cups fresh cranberries                                             1/2 cup port
2 cups sugar                                                                1/4 cup orange liqueur
3/4 cup water

Now Let's Make Grandma Erma's Spirited Cranberry Sauce!
Please visit the site for the original recipe, linked above; below is my own rendition with details (as usual) based on the cooking experience. 

Begin by measuring out 4 cups of cranberries.  This is about 1 2/3 bags of Oceanspray cranberries; I have a 4 cup Pyrex measuring cup, that I filled up to the brim, which is slightly more than 4 cups. (greedy, greedy) Set the cranberries aside.

Cranberries!
In your 3-qt saucepan, combine 2 cups sugar, 1/2 cup port, and 3/4 cup water, stir until well mixed and sugar has begun to dissolve.  Don't worry too much about the quality of the port, either (unless you want to/can afford to); I used a cheap port picked up in my local grocery store (granted, it was the only one they had...).  Add your cranberries and stir the mixture around a bit.

Heat the mixture over medium high heat. To begin with you will have many more cranberries than liquid, so don't worry. The cranberries will cook down a bit.  Bring the mixture to a boil, stirring frequently.  Cook until the cranberries begin to crack.  The original recipe says to cook for about 8-10 minutes; I found that mine took about 10.  Don't pull it off the heat at the first sign of cracking, let the majority of the cranberries split open first. Once this has happened, remove it from the heat and let it cool at least 15 minutes.


Now pulse!
Once the cranberries have cooled, pour the mixture into your blender or food processor (hold the lid down tightly if you use a blender; ask me how I know). Blend the mixture on a low setting until the cranberries have reached your desired consistency.  This can be pureed, as the original recipe recommends, or you can leave some the cranberries still partially in tact (as I prefer).

Pour this into the storage container, and stir in 1/4 cup of orange liqueur.  Southern Living tested with Grand Marnier, but I used Gran Gala, so I doubt brand matters too much. Seal the container and chill for at least 8 hours before serving.  I made mine two days before the big day. Serve with your favorite feast (or feast leftovers, as the case may be); I know I'll be whipping it up again for Christmas.  This recipe took me for a 180; I now eye cranberry sauce with longing rather than loathing. And, it was super easy, too.

Om nom nom


Sunday, October 9, 2011

Sugar and Spice

And yes, both items are ingredients in today's recipe post on Spiced Sausage and Rice. (You can just stop "eeewww"ing about the sugar in a sausage dish).  This is one of those dishes you make when you realize that you're going to have to make do with what's on hand because you were to busy (read, lazy) to go grocery shopping.  This particular dish came out of a throw-something-together night with friends; it turned out so well that I have since taken it and tweaked it until it was an actual recipe.  The recipe below serves 2 - 3 people without side dishes and can be easily doubled if needed.

What You'll Need
Supplies
1 medium pan                                                                 1 cutting board
1 small pot                                                                      1 knife for slicing
1 cooking spoon                                                              1 knife for chopping
Measuring cups
Ingredients
1 cup jasmine rice                                                          1/2 Tbsp ground cardamom
5 chicken sausages                                                         1/2 Tbsp cinnamon
1 small yellow onion*                                                     Dash ground coriander
1/2 red or green bell pepper*                                         Small dash ground cloves
1 small handful light brown sugar                                 Olive oil

Now Let's Make Spiced Sausage and Rice
Double, double, toil and trouble
Measure out 1 cup of rice and set it to the side of the stove to be on hand later (or, you know, run around like a chicken with its head cut off like I do when I forget to measure out the rice, either way). Measure out 1 3/4 cup water and pour it into your small pot.  You can also follow the instructions on the back of the rice bag, but I find you get a dryer rice if you reduce the water by 1/4 to 1/3 cup.  Set the pot on the stove and turn heat to high to bring water to a boil.  Once water is boiling add rice and stir once.

Uncovered rice is indecent
Cover the rice and reduce heat to 2 or 3.  Now you can ignore the rice for a little while, fluffing it with a fork occasionally until done.  Meanwhile, get out your cutting board and peel and dice the small onion.  Put a smidge of olive oil into the medium pan and set the heat to medium.  Add the onions and saute.  While the onions are cooking, cut the bell pepper in half, saving one half for a later date.  Remove the core and seeds from the remaining half and dice it.  Add to medium pan to saute. ("why are there no pictures of this step?" you ask.  Because I needed to go to the store so badly that I didn't have them on hand. Fortunately onions and bell peppers are optional ingredients).

Chicken sausage sounds a little wrong
While the onions and peppers are sauteing, slice the chicken sausage into small dials about 1/3 of an inch thick.  I like to use an off-brand italian chicken sausage, since the "italian" part of that seems to mostly consist of peppers. Also, I find that the seasoning is light enough to compliment the dish. When you're done slicing the sausage, add it to the sauteing vegetables (they should be pretty tender by now).  Use your cooking spoon to move the ingredients around the pan occasionally as you saute to ensure even cooking and prevent scorching.

Just ignore the lack of onions/peppers
Add the 1/2 Tbsp cardamom, 1/2 Tbsp cinnamon, dash of coriander, and small dash of cloves. (And I do mean a small dash, unless you want your tongue to go numb).  You can also add a sprinkle of salt to taste if you'd like.  Stir in the spices until the meat and vegetables are fairly evenly coated.  Now add a small handful of brown sugar to the mixture.  In terms of my hands, this equals about 1/4 cup, maybe a little less. Mix this into the sausage and vegetables until they are evenly coated.  By now you should have a thick, slightly goopy (from the sugar) sauce in the pan. Once the sausage is cooked through, reduce heat to low.

Back, foul demon!
Don't forget to fend off any hungry gatos that might be stalking you during the cooking process.  The black ones are especially dangerous, due to their ninja-like camouflage.  I caught this one deviously eyeing my back as I sauteed the sausage, attracted by the scent of raw meat and licking his chops.  But I'm on to their wily ways. (It also helped that he was perched on a white washer and dryer, but still).


I've nothing funny to say about rice
Now, check your rice. Hopefully it's nice and dry and fluffy (see the pretty picture to the right).  If, however, it is not dry and fluffy and there is instead water in the pot still, then your rice is not done yet. The key is to cook the rice until the water has been completely absorbed by the grains.  If your rice does not seem to be doing this, try slightly increasing the heat (I said SLIGHTLY!).  Keep the rice covered as it cooks, and be careful to watch it closely, since you don't want to burn the rice in the bottom of the pot.

To serve, dish rice onto the center of a plate or into a bowl.  Top with the sausage, and nom.


Sunday, September 25, 2011

How Do You Like Them Apples

Personally, I prefer mine in pie form.  It's certainly the right time of year for it, since seasonal apples abound.  If at all possible, you want to make this from fresh apples when they're in season.  It'll yield a much better flavor that way.  This weekend, my father and I took a trip up to a local orchard to invest in apples, apple cider, and other items of appley goodness.  If you're lucky enough to have a local grower, I strongly encourage you to make a visit: you'll be helping a local business and get fresh produce at good prices to boot!  This particular recipe for a lattice-work apple pie is really easy, but I warn you it's a lot less precise than my previous postings.

What You'll Need
Supplies
2 pie plates                                                                            1 knife for slicing
1 peeler                                                                                  1 large bowl
1 cutting board
Ingredients
6-7 apples                                                                             All-purpose flour
4 pie crusts (that's two boxes of pre-made)                         Brown sugar
Ground cinnamon

Now Let's Make Apple Pie
Neat and trim
Preheat the oven to 350F.  Line each pie plate with a crust, making sure that it fits perfectly against the bottom and sides of the dish.  Trim off any excess crust that hangs past the edge of the plate.  You can save this if you have a recipe that enables you to use it immediately (like a fruit turnover if you have extra apple or other fruit), you could save it for a decorative finishing touch, or if there's not very much, you can toss it. Put the crusts into the oven for a about 9 minutes, until they are just barely cooked: no longer raw, but no where near brown. A note about the crusts, for this go round, I used boxed crusts, because I was 1) feeling lazy and 2) didn't have the time to make them from scratch.  You may either make the crusts from scratch or buy them from the grocery, just make sure you have enough for two bottom crusts and two top crusts.  If you choose boxed crusts, get Pillsbury, they're only a few cents more and the off-brand doesn't brown properly. (and we can't have subpar pie floating around)

Golden Delicious and Winesap
Once the crusts are done, set them aside to cool.  Now comes the labor intensive part: prepping all those apples.  The ratio is about 3 to 3.5 apples per pie, and this recipe makes two pies.  You want to choose at least two different apple types that are excellent for baking purposes, so that's about three of each type.  This time I used Golden Delicious and Winesap; these apples are good for both baking and eating (so I know any extras will get nommed instead of wasted).  This combination gets a nice sweet apple pie, if you want a tarter pie I recommend using a Granny Smith as one of your apples.

Peeeeeeeel
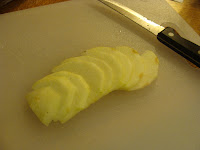
Using your peeler, peel each apple thoroughly. I like to do this sitting in front of a good show with a plastic sack for peels in my lap, but that's just me.  I like to do the next steps in the apple prep one apple at a time.  On the cutting board, quarter each apple and then slice off the part of the core that is on each quarter. Then, place each quarter so that it can stably lay on one of its sides and thinly slice up the apple.  Place the sliced apples in your large bowl as necessary to clear room on the cutting board. Repeat this process for each apple, and make sure to fend off any apple-loving cats while you're at it.
Final layer with brown sugar
Fetch your cooled pie crusts.  For each pie, dust the bottom with flour. Add a layer of apples; make sure to cover the entire bottom of the pie, overlapping a little if needed. Follow this with a layer of liberally dashed cinnamon, another dusting of flour, and a slight sprinkle of brown sugar.  Repeat this process once more, starting with the apples, to create a second layer.  For the last layer (it should be the third), do a layer of apples and a layer of cinnamon. Instead of the flour, liberally sprinkle the entire top of the pie with brown sugar; this should be a much more significant amount than the barely noticeable sprinkle of previous layers. (Yes, I know these amounts are incredibly vague)

Now it's time to create the lattice-work top crust; you'll want to do this one pie at a time.  Take the top crust and roll it out over your cutting board.  Slice the crust into long strips that are about 3/4 of an inch wide.  Place strips less than an inch apart going across the pie one way.  Seal the strips along on side of the pie, leaving the other end of the strips unsealed.  Peal them back. One at a time, add strips that travel across the pie perpendicularly to the other strips. Seal the strip to one side and then weave this strip in as you lay it across the pie by alternately laying the peeled back strips either under or over the strip you're working with.  When you reach the other side, seal the strip your working with (both sides should be sealed) and peel back the other strips again.  Repeat, spacing your strips a little less than an inch apart until you reach the other side of the pie.  Seal the pealed back strips to their side of the pie.  Fold any excess crust from the strips along the inner edge of the pie and then seal the entire edge using a fork. (Now would be the time to add any other decorative flourishes you might have planned)

Mmmmm... pie!
Bake the pies at 350F for about 30 - 40 minutes, until the crusts are golden brown.  Let cool a bit, then slice and serve warm with whipped cream or vanilla ice cream (or both!)

And, just for a little fun (also he's threatened me with claw-filled violence if I don't), here is some photographic evidence of my cat's obsession with apples.


Saturday, September 10, 2011

Oh Snap!

Gingersnaps that is.  Today's post is going to delve into the food side of the blog.  I thought I'd start with one of my absolute favorite cookies.  Fall has definitely been in the air here in the South lately, which puts me in the mood for baking.  I can feel my annual holiday cookie frenzy just around the corner. (Just ignore my twitch.)

What You'll Need
Supplies
1 medium mixing bowl                                                     1 large mixing bowl
Measuring cups and spoons                                             1 cookie sheet (nonstick)
A whisk or sifter                                                              A beloved mixing spoon

Ingredients
2 cups all-purpose flour                                                   1/2 tsp salt
1 Tbsp ground ginger                                                      3/4 cup vegetable shortening
2 tsp baking soda                                                             1 cup sugar + some for rolling
1 1/2 tsp cinnamon                                                          1 egg
1/2 tsp ground cloves                                                      1/4 cup molasses

Now Let's Make Cookies (Mmmmmm... coooookiess)
To start, preheat the oven to 350 degrees F. This is the hardest part; seriously, I always forget.

Whisk, whisk, whisk!
Now, in your medium bowl, whisk together the flour, ginger, baking soda, cinnamon, cloves, and salt.  You may also choose to sift the ingredients together, but I usually choose whisking because it's less messy and just as effective.  (Also, I have no idea where my sifter is at the moment.  Heh heh).  Set the dry ingredients aside.

Effectively beaten shortening
Beaten til fluffy. Violence!
In your large mixing bowl,  beat the shortening until it's soft.  Try to keep it in a concentrated area of the bowl.  The more it spreads out, the more scraping of sides you'll have to do later when you're trying to mix in all the other ingredients.  Since it's vegetable shortening it should already be fairly soft, unless you have been storing it somewhere cold.

Now you're going to add that cup of sugar.  Gradually.  I usually do this at about 1/4 cup at a time, measuring as I go, but you're welcome to choose your increments; the important thing is to not just dump it all in there.  After each addition, beat the sugar into the shortening.  By the time you're through, the mixture should be light and fluffy.

Add the egg and molasses. Mix this in thoroughly; you don't want any pockets of liquid. (There was going to be a photo for this step, but it looked a wee bit gross on film, so I refrained. You're welcome.)

This is nothing like chocolate chip
Grab your flour mix from earlier in the recipe and dump it onto the shortening mixture.  Again, mix this in thoroughly; there should be no pockets of flour or excessively dry bits.  I do this with my favorite (and well loved) mixing spoon, pictured above; however, you could easily do this with a mixer set to medium low.  It's a dryer batter, so I prefer low tech here.  When you're done, you should have a stiff, caramel colored batter.  Scrape any remaining batter off your spoon and into the bowl.

Set your dough to one side.  Take your flour bowl and wipe out any remnants of the dry ingredients.  Add about 1/4 cup of sugar to the bowl. If you haven't washed your hands yet (for shame!), do so now as you'll be handling the dough quite a bit. Pinch off a small amount of dough and roll it between your hands to form a ball 1" in diameter.  If the dough is falling apart, squish it a few times in your hand before rolling it into a ball. Place it in the sugar bowl.

Roll the ball in the sugar until it is lightly but evenly coated in sugar granules.  I usually do about three balls at a time, but there's no firm rule.  Once the ball is covered, place it on a cookie sheet.  Your dough balls should be placed at least an inch to and inch and a half apart on your sheet.  Repeat this process until your dough is gone.  The recipe should yield about two sheets worth of cookies.

Bake each sheet in the oven at 350F for about 9-10 minutes.  I bake one sheet at a time, as it typically yields more uniform results, and you are less likely to burn or undercook your sheet of cookies. The cookies will be
Cooling Cookies
quite soft when fresh out of the oven and will have cracking surfaces.  Let it sit on the tray for a few seconds to solidify and then remove the cookies to cool.  If you're lucky enough to have a cooling rack, place the cookies there.  However, paper towels on top of a clean counter work just as well and have the added benefit of absorbing any greasiness. As the cookies cool, they will harden into their snappy goodness and you can place them in a convenient container.

Noms
Now you're ready to settle down on the sofa, wrapped in a blanket with a good book and a plate of homemade gingersnaps by your side. NOM!