Showing posts with label South. Show all posts

Thursday, April 26, 2012

Curious Cats and Whiskery Puns

I've been on a cozy mystery kick lately; maybe it's the onset of spring, but I've been craving tales of country life and the outdoors.  Accordingly, I've picked up where I left off in the Mrs. Murphy Series by Rita Mae Brown. I've posted a general series post, The Cat's Meow, on these books before, where I covered the overall feel of the series.  But, I think it's time to dig deeper to give you more of an idea of why you should pick this series up, so let's start with book 12.

The Basics
Brown, Rita Mae and Sneaky Pie Brown. Whisker of Evil. New York: Bantam Books, 2005. Print.

In reviewing my previous blog post, I've realized that I never did a bio for the author - a gross oversight.  So, Rita Mae Brown. Ms. Brown has a rich history as a political activist in various rights movements. She's an active participant in American fox hunting, and her passion for fox-hunting and horses hovers ever present in much of her fiction. Lastly, she co-authors the Mrs. Murphy series with her cat Sneaky Pie, and that's probably the most awesome fact at all (or so Sebastian R. Gato informs me).

To date, there have been 20 Mrs. Murphy books and one cookbook (which I really should get my paws on). Set in the rural Southern town of Crozet, Virginia, the series follows Mary Minor "Harry" Harristeen as she sticks her nose into every mystery that comes her way. And, there's a whole lot of murder going around in Crozet (perhaps they should check the water).  Fortunately, Harry has her animal companions to bail her out with their superior senses and mystery solving skillz:  Mrs. Murphy, a tiger cat; Pewter, a somewhat chubby gray kitty; and Tucker, her loyal and dauntless Pembroke Corgi.

The Book
Let's start with the title: Whisker of Evil.  I mean, what's not to love about that title! Doesn't it just conjure the image of a cat twirling its whiskers like a villain twirls his mustache? Which brings me to the best characters in the series, the animals.  Much of this story (and the others) is told in a third person point of view that follows not the human characters, but the animals who are in the human's presence.  This makes for a really fun, interesting, and different perspective.  And, as usual, Mrs. Murphy, Tucker and Pewter are whip smart and on the job.

So far, this has been my favorite book in the series to date.  In part, this is the result of the atmosphere Brown creates for her chosen setting.  I've complimented this series before on the vividness of the countryside in which the books are set, but this book exceeds all expectations.  You don't simply get a feel for the South or Virginia in this book. The book is so steeped in themes of country life, farming, horses, Southern charm and hospitality that I feel like I could reach out and run my hands over the slightly rough wooden exterior of Harry's barn.  I don't just feel like there's a well-described vivid world for me to view; I feel like I've been plopped down in this corner of Virginia and let loose to explore. It's that well done.

The other reason this is one of my favorite books so far is the quality of the mystery. This one took me and extra long time to solve. I still got there ahead of Harry (my typical goal when reading mysteries), but this one was a little harder to piece together.  I found my suspect about halfway through, but wasn't at all sure of the whys and hows, the mechanics of the mystery, until very close to the conclusion.  I'm never convinced that I've pinpointed the correct culprit until I understand those elements.  This book really drew me in by keeping me guessing.

Extras


Sunday, March 11, 2012

Shrimpy Grits, So Much Better Than Gritty Shrimp

So I figured it was about time for another straight-up Southern recipe.  My mother has been after me to make Shrimp and Grits for a while, so I finally did.  I'd never made this particular dish before, so it gave me an opportunity to experiment, which is always fun. To create this recipe, I took what I knew about the basic ingredients for Shrimp and Grits and adjusted until I had something I was pleased with. I'd like to play with it a bit more, perhaps get some tomato flavor going, but I'm super-pleased with how this turned out. If you don't know what grits are (Bless your heart, you poor deprived thing), check out this Wikipedia page on the topic.

What You'll Need
Supplies
Cutting board                                                             2 qt. pot
Knife for chopping                                                      Small bowl
Cheese grater                                                             Large cast iron skillet
Medium mixing bowl                                                  Large serving bowl
Ingredients
4 cups water                                                              Olive oil
1 cup stone-ground grits                                            3 tsp garlic, minced
3/4 cup white cheddar                                               3 green onions
3/4 cup sharp cheddar                                               1/2 Tbsp parsley
1/2 cup parmesan                                                      1/2 tsp ground cayenne pepper
1/2 stick butter                                                          2 dashes chili powder
1 lb. shrimp                                                                Lemon juice
4 slices bacon

Now Let's Make Shrimp and Grits!
Lovely Assistant Jen
To begin, measure out 4 cups of water into your 2 qt pot and set it on the stove over high heat so that you can bring the water to boil.  While the you're waiting on your water, measure out 1 cup of grits (for you non-Southerners that's grits plural, please don't ever call them grit) and set them aside. Now, begin shredding the two cheddar cheeses. You want to shred enough to have 3/4 cup of each, which is about 2.5 -3 oz (if you have a lovely assistant, now is a great time to put her to use). Chop your green onions, discarding the white parts, and mince your garlic (or use jarred minced garlic like me). If you're using fresh parsley, chop that, too.  Set aside.

Once the water comes to a boil, add the dry grits.  Reduce to a low heat and cover. You'll want to stir occasionally to ensure that your grits don't get lumpy or start to stick. While you're waiting, combine the sharp cheddar, white cheddar, and parmesan in your medium bowl.  You don't have to mix it, but you want it all together before you add it to the grits later. Cut the 1/2 stick of butter into pieces over the bowl of cheeses. Set aside. (Sorry if the photos are a bit off tonight guys, my camera batteries were both dead, so I had to steal Lovely Assistant Jen's iphone).

Cameo! That's my Mom.
Stir your grits (Stir, I say! *cracks whip*).  Take your shrimp and the small bowl to the sink.  Begin removing the tails from your shrimp, placing the shrimp in the bowl and the discarding the tails.  Try to remove as much meat from the tails as you can. If you're not careful, the shrimp will rip and you'll leave behind a small portion in the tail. I find a couple wiggles at the the base of the shrimp before you pull it out helps this process along.  For this recipe I used precooked shrimp (because it's quicker and was on sale; mostly because it was on sale). It's fine, however, to use uncooked shrimp (they'll likely better absorb flavor, anyway), just know that you'll need to cook them a bit longer later in this recipe.

Stir your grits.  Now, lay out 4 slices of bacon in your large cast iron skillet and fry the bacon over medium heat until crispy (you'll know it's done when you find it really hard to resist eating it). Remove the bacon to some paper towels, and pat to remove grease. Try to get as much grease off the bacon as possible. Set aside.

Check your grits; they'll be done as soon as all the water is absorbed. If they're not done, stir and keep cooking. You'll have to wait until they're done to move farther in this recipe, since the shrimp cooks quickly. Hopefully, though, the grits have had plenty of time to cook. Pour the grits into your large serving dish.  Add the bowl of cheeses and mix thoroughly until all the cheese has melted. Make sure to blend everything together well; you don't want any pockets of cheese or of plain grits. Place the serving dish in the oven on warm until the shrimp are done. This will help the grits set, while also keeping them from cooling (cold grits are foul, by the way).

Take your large skillet and drain off any excess grease from the bacon.  Add a dab of olive oil and heat the skillet to medium high heat.  Add 3 tsp garlic, 1/2 Tbsp parsley, 1/2 tsp cayenne pepper, a couple dashes of chili powder, and the green onions. Cook until the garlic begins to brown (This will help release flavor). Add the shrimp and saute until the spices are evenly distributed and the shrimp have heated. Do NOT overcook (no one likes rubbery shrimp). If you're using uncooked shrimp, cook the shrimp until they turn pink and begin to curl, about 3 minutes.

Spoon the shrimp on top of the center of the grits. Make sure to get all the seasonings, too; pour the contents of the skillet over the top of the shrimp if necessary.  Squirt the shrimp with a little bit of lemon juice to taste. Garnish by crumbling the strips of bacon over the grits and around the shrimp in the center. Serve.


   Pin It

Sunday, January 1, 2012

A Red Velvet Holiday

Happy New Year from The Book Pantry! This Christmas dinner, I served a Red Velvet Cake for dessert.  Red Velvet Cake is a southern tradition, although it seems pretty popular elsewhere, too. (And, really, what's not to like?). Mine is loosely based off a recipe for the cake in The Boozy Baker cookbook, to which I've made a few alterations of my own (mainly the type of alcohol and the amount of food coloring). The cream cheese icing recipe is my own, but there's only so many ways to make cream cheese icing, just saying.  This is a delicious and pretty cake sure to impress anyone you happen to serve it to.  Despite my usual low-tech approach to baking (enforced only because I lack toys), this recipe needs a mixer. You cannot mix the cake batter by hand and not over mix, thereby creating a tough cake.

What You'll Need
Supplies
2 nine inch cake pans                                          Measuring cups
Large mixing bowl                                              Measuring spoons
Medium mixing bowl                                           Mixing spoon
Small mixing bowl                                               Long serrated bread knife
Stand mixer                                                         Icing knife/spatula
Whisk                                                                  Cutting board
Cooking spray                                                      Chopping knife
Ingredients for Cake
3 cups cake flour                                                  1 tsp vanilla extract, running over
5 Tbsp cocoa powder                                           1 tsp white vinegar
1 1/2 tsp baking soda                                          3 oz red food coloring
1/2 tsp salt                                                           1 1/2 sticks unsalted butter, softened
3/4 cup buttermilk                                                2 cups sugar
1/4 cup rum                                                          3 eggs
Ingredients for Frosting
16 oz cream cheese, softened                               2 cups confectioner's sugar
2 sticks butter, softened                                       4 Tbsp vanilla
3 cups pecans

Now Let's Make Red Velvet Cake!
Preheat the oven to 350F.  Time for prep work: Remove your 16 oz of cream cheese and 2 sticks of butter from the refrigerator and set aside to soften until you're ready to do the icing. Also remove your 3 eggs so that they come close to room temperature by the time you need them.  Now, coarsely chop enough pecans to equal 3 cups: that's about 4 handfuls.

Spray your two cake pans with cooking spray.  Pour out a small pile of flour into each pan (click to enlarge photos for an example). Dust the pans with the flour by holding the pan up and tilted and tapping the bottom, rotating the pan as you go to allow a thorough coating.  Once the bottom of the pan is coated, continue this process with the remaining flour around the sides of the pan.  I recommend doing this over the kitchen sink, as it can get a little messy.  Set your coated pans aside.


Cocoa Powder! *shakes fist*
In your medium mixing bowl, measure out 3 cups cake flour, 5 Tbsp cocoa powder, 1 1/2 tsp baking soda, and 1/2 tsp salt.  Whisk the ingredients together until they are evenly distributed and there are no large cocoa powder lumps (cocoa powder is sneaky and devious; be thorough in your eradication). Set the dry ingredients aside. 

In your small mixing bowl, measure out 3/4 cup buttermilk (not that non-fat gunk, either; that defeats the purpose of buttermilk), 1/4 cup of rum, 1 tsp vanilla extract (allowing the vanilla to run over into the bowl slightly as you measure), 1 tsp of white vinegar, and 3 oz of red food coloring. Whisk the ingredients together until you have a (very red) smooth liquid mixture.  For a brighter cake add food more food coloring, but be aware that it affects flavor a little.  If you'd like to avoid food coloring altogether, puree 1-2 cooked beets. Keep in mind that the interaction between the buttermilk and the cocoa should achieve a slight red color as it is (woot! Chemistry!). Set the liquid mixture aside.

No shells in this cake!
Place 1 1/2 sticks of butter in your large mixing bowl.  Soften in the microwave if necessary, being careful not to fully melt the butter.  Using your mixer at a low speed (about 2 on mine), beat the 2 cups of sugar into the butter until fluffy. Then, add the eggs one at a time, beating after each addition. I recommend stopping the mixer for each egg addition, so that you can fish out any stray pieces of eggshell that might make their way into the batter. (Remember, an easy way to remove pesky shells is to wet your finger before trying).

Set your mixer to medium-low speed (about 4 on mine, but don't turn it on yet).  For this step you are going to gradually add the flour mixture and the buttermilk mixture, alternating between the two.  You want to do this is partial amounts; I typically wind up with four additions of each.  Start with the flour mixture and end with the buttermilk mixture to achieve the appropriate consistency for your batter. Be careful not to go too slowly and over mix your batter.  Over worked batter will result in a tough, chewy cake. (Blegh!)


Divide the cake batter between your two cake pans, scraping the bowl to get all the good bits. Lightly shake your pans from side to side to settle the batter evenly into the pans.  Bake at 350F for about 40 minutes.  Test the doneness of the cakes by inserting a toothpick (or fork prongs) into the center of the cake. Cakes are done when toothpick comes out clean.  Set cakes aside to cool.

Yes, it's upside down.
Once cakes are mostly cool, remove one cake from pan and place it on your icing station (work area, display, wherever you're planning to ice the cake).  Take your long serrated knife and evenly slice off the curved top of the cake, so that you'll have a flat bottom layer.  Offer the cake top to any circling family members that happen to be around. (Vultures!) Loosen the other cake in the pan, but leave in pan until cakes are completely cool.

Mmmmm... frosting.
While cakes are cooling the rest of the way. Wash out your large mixing bowl, so that you can begin whipping up the frosting.  Place your 16 oz of cream cheese, 2 sticks of butter, 2 cups of confectioner's sugar and 4 Tbsp of vanilla in the (now clean) bowl.  Stir the ingredients together with your mixing spoon until you have a thoroughly blended, smooth frosting. You can flavor the frosting with anything you'd like, simply replace the vanilla with your choice of flavor (lemon juice, more rum, orange liqueur, etc).

Spread some frosting on top of the already stationed cake.  (Do not do this if cake is not yet cool, or you'll have a melty, blobby cake and who wants that?). Smooth the frosting across the surface of the cake until you have a decent layer of frosting.  Remove the other cake layer from its pan and carefully place it centered over the bottom layer.  You can cut the top off this one, too, if you want a flat topped cake, but I never bother. Gently spread frosting over the entire cake, beginning with the top before moving on to the sides.  Try to avoid any bare or translucent spots where the cake shows through.  Once all the frosting is on the cake, smooth it out to make it purty.

Yum!
Now, take your chopped pecans and begin coating your cake.  Start with the top center and work your way outward.  You want some white to show through but don't want any bald spots, so try to be even handed.  "How do you coat the sides?" you ask. I grab a small handful of chopped pecans, get close to the cake and toss/press the nuts into the cake.  This is really messy, so have a broom handy (or a pecan loving dog, either will do).  
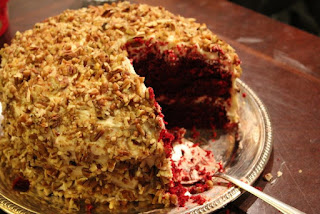
Isn't it pretty?!
Now, stand back and admire your handy work!  This cake goes really well with postprandial coffee.

Big thanks to my future step-brother, Stevie, for letting me use his Nikon and helping with the pictures. I'm actually in one! Le gasp.  Also, thank you to my lovely friend Jen for doing the second stage icing, thus preventing me from my annual apoplectic frosting rage.  


    Pin It

Monday, October 17, 2011

Good with Food!

Or so Coca-Cola advertisements once told us.  Tonight's food posting features another classically southern recipe: Coca-Cola cake.  If you live/ were raised in the South and have somehow missed out the sheer, blissful deliciousness that is Coca-Cola Cake, then you have been jipped, cheated, deprived even (I'm looking at you Mom and Dad).  But not to worry, because you can rectify that problem now!  I got this recipe, with some minor adjustments and expansions of my own, from the discussion guide for Mark Childress's Georgia Bottoms (which suspiciously resembles one on several recipe sites. I wonder who copied whom).  Although, I had to figure out the frosting for myself since the recipe simply tells you to use Coca-Cola frosting (Gee, thanks).

What You'll Need
Supplies
Electric mixer                                                               1 knife for chopping
2 small mixing bowls                                                   Cutting board
1 medium mixing bowl                                                 13 x 9 casserole dish
Mixing spoon                                                                Whisk
Small Saucepan                                                            Small cooking spoon
Ingredients for Cake
1 cup Coca-Cola                                                            1 1/2 cups sugar
1/2 cup buttermilk                                                        2 large eggs
2 cups all-purpose flour                                                2 tsp vanilla extract
1/4 cup cocoa                                                                1 1/2 cups mini-marshmallows
1 tsp baking soda                                                          1 cup pecans, chopped
2 sticks butter, softened (1 cup)
Ingredients for Frosting
1 stick butter  16 oz powdered sugar                            16 oz confectioner's sugar
1/3 cup Coca-Cola                                                         1 Tbsp vanilla extract
3 Tbsp cocoa

Now Let's Make Coca-Cola Cake
Before we get down to the nitty gritty, let me make a quick note (veiled threat) about ingredients.  First, use real vanilla extract not the fake stuff (blegh!). Second, and most importantly, don't you dare use Diet Coke; it is not the same, so suck it up and deal with the calories (notice, I'm not even considering the possibility that someone might use Pepsi; you wouldn't do that, right? Right.)

Now whisk! Whisk, I said!
Start by preheating the oven to 350F.  In one of your small bowls, mix together 1 cup Coca-Cola and 1/2 cup buttermilk.  Set this aside.  In the other small bowl combine 2 cups flour, 1/4 cup cocoa, and 1 tsp baking soda.  Whisk these together until there are no lumpy bits (doesn't that sound tasty!). If you don't have a whisk handy, you can always use a fork; it'll take a little longer, but don't sweat the small stuff.

Creamy butter
Add 2 sticks of butter to your large mixing bowl. If the butter hasn't gotten soft yet, microwave it for about 20-30 seconds.  The trick is to get the butter soft but not melted.  Beat the butter at a low speed with your electric mixer until creamy (or if you are lacking a mixer, go to your Da's house to use his, like me. *hint, hint*).  Since I think that all soft butter is kind of creamy, I have thoughtfully provided you with a photo of this step.  Sweet? I know.

Still mixing at a low speed, begin gradually adding the 1 1/2 cups sugar.  Beat until well-blended and kind of fluffy.  Crack your two eggs into the bowl. If you get some egg shell in there, just wet your finger and pull it out; that way you don't have to chase the shell around the bowl for 5 minutes (ask me how I know, heh heh).  Add 2 tsp of vanilla, letting it run over a little as you measure it out for extra tastiness.  Beat eggs and vanilla into butter mixture at a low speed until thoroughly blended.


Begin adding the flour mixture and the Coca-Cola mixture to the batter, blending at a low speed.  Alternate between the two as you add, but make sure you begin and end with the flour mixture.  This is particularly important since the Coke, which makes the cake tender and fluffy, will also make your batter somewhat mealy until the next addition of dry ingredients (which looks a little funky, I know).  Make sure that each addition is well-blended before adding more.


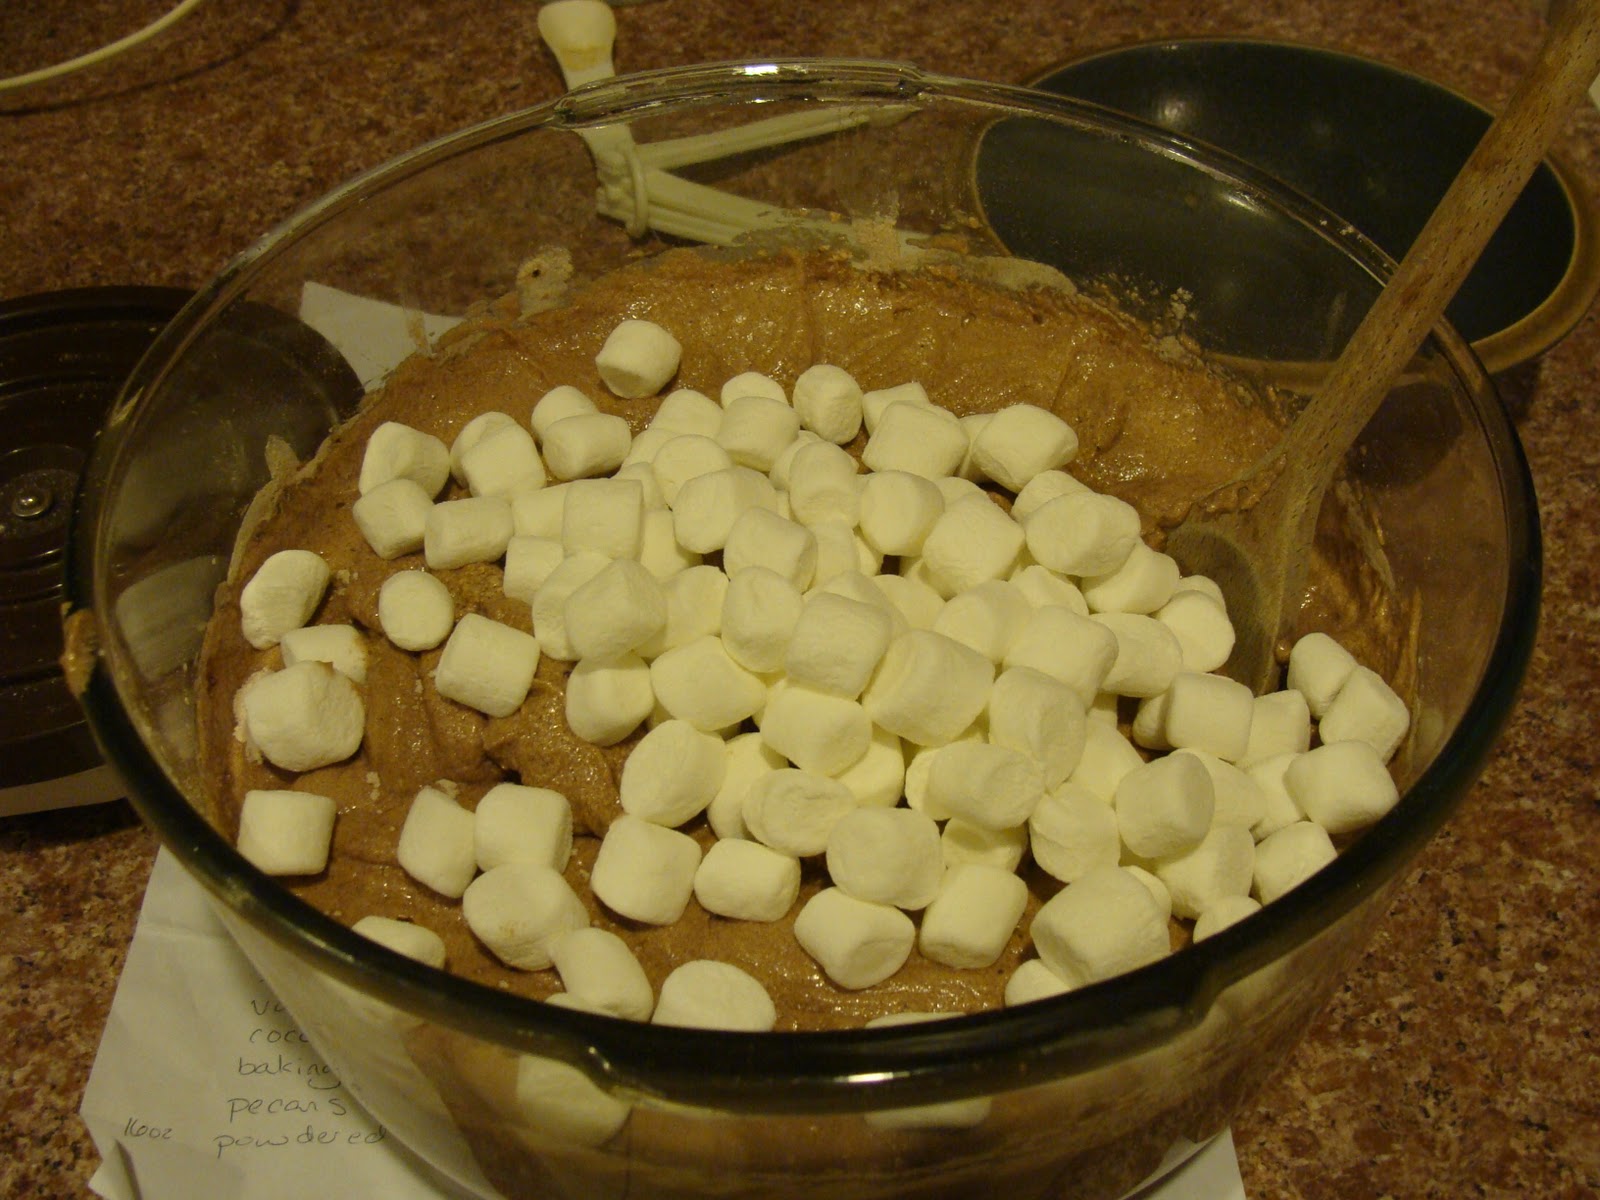
Remove the large mixing bowl from the mixer.  Measure out 1 1/2 cups of marshmallows, packing them down nice and tight as you do so (what can I say, I like marshmallows).  Add them to the batter, and stir them in with your mixing spoon.  Do NOT try to blend the marshmallows in with the mixer.  As you stir, make sure the marshmallows get mixed evenly throughout your batter; you don't want a concentration of marshmallows anywhere.


Pour the batter into a greased 13 x 9 inch casserole dish or pan.  Scrape the bowl thoroughly to get as much battery goodness into the cake as possible (let's not be wasteful, y'all), and spread the batter into the pan until all parts are even.  It's a thick batter, so you'll probably have to do a lot of scraping and spooning.  Bake the cake at 350F for 30-40 minutes.  When the cake is done a knife inserted into the middle will come out clean.


Sticky goodness
While the cake is cooling a bit, start preparing your Coca-Cola Frosting.   Cut one stick of butter into chunks into your small saucepan. Add the 1/3 cup Coca-Cola and 3 Tbsp cocoa. Heat over medium high heat, stirring frequently, until the butter is melted and the frosting comes to a light boil.  Remove from heat and whisk in the confectioner's sugar and 1 Tbsp vanilla.  Again, if you don't have a whisk, and fork will do fine.

No cake picture for you!
Chop up some pecans into coarse pieces until you have 1 cup. Sprinkle the pecans over the top of the cake. Then, pour the frosting over your cake, spreading it evenly over the top of the cake so that it reaches all the edges and there are no bare bits.  This way your pecans get frosted, too.  However, if you prefer, you can frost the cake and then add the pecans. Both are equally tasty options. The longer the frosted cake sits, the more you'll notice the top of the frosting hardening a bit.  This is normal.

This cake is not a lie.
Let the cake cool for about 10-15 more minutes. Cut the cakes into squares and serve! My picture isn't as pretty as usual, because I got excited and cut the cake a little to soon.  Thus, my square didn't stay geometric, and went plop instead.  Still nommy! Now, where are my leftovers?


Thursday, October 13, 2011

Southern Bottoms, I Mean, Belles

A few weeks ago I realized that my blog and upcoming reading list was a little light on male authors.  It's not that I don't like the stuff men write, I just tend to prefer classics (and really, who can fault me for preferring Dickens?). So, my goal of late has been to find more contemporary male authors that I actually enjoy reading.  I discovered that many such authors can be found in the young adult and fantasy/science fiction genres, but I was determined to branch out further.  In doing so, I followed a recommendation and discovered Mark Childress and his latest novel, Georgia Bottoms, which I had been eyeing on the new fiction shelves for some time. (The shoes on the cover are what did me in.)

The Basics
Childress, Mark. Georgia Bottoms. New York: Little Brown and Co., 2011. Print.

Mark Childress has written seven novels and three children's books, as well as articles for various prominent periodicals. Childress was born in Monroeville, Alabama, and his southern roots certainly show through in Georgia Bottoms, a novel so steeped in the south that you can practically see Tara on the horizon.  Georgia Bottoms follows the life of its titular heroine as she endeavors (I had written struggles, but southern women simply don't do that) to juggle her six lovers.  Well-liked in her town and viewed as a good Southern Belle and Baptist, it is imperative for Georgia to keep her lovers and their "gifts" a secret. Hilarious, selfish, charming, and infuriating, Georgia keeps readers guessing and fascinated.

The Book
I love the way Georgia Bottoms captures a small slice of southern small-town culture.  It gives readers a taste of the society and complex social rules and interactions that govern life in the south.  Childress infuses a distinct sense of southernness in his novel that I recognized from the start and found entirely relatable and believable. Sometimes this taste of the south crops up as Georgia guides readers through the niceties of calling on an acquaintance.  Or, it's present in the pernicious racial politics that still stifle life in the South. At other times, it appears as Georgia organizes a formal dinner party, complete with pimento cheese and chicken salad sandwiches (served in triangles if she's worth her salt). Childress neither romanticizes nor demonizes life in the South; instead, he simply presents a picture of such a life, good and bad just as anywhere else.

I also enjoyed the fact that, while you'd think this would be a book about sex, it is nothing of the sort.  In fact, the sexual aspect of the book plays third fiddle to Georgia's personality and interactions with  others (thank goodness, since what there is turns me into a nine year old going "groooooooossss").  The few moments that actually focus on Georgia's love life are there to reveal the intricacy of Georgia's personality: her ability to act, her distance and lack of real emotion for her lovers, and her sense of responsibility to provide for her family.  It also illuminates her capacity for denial; Georgia is very determined that she is the lover of these six men (as opposed to mistress or prosititute), and she insists to herself that the gifts left by her lovers are freely given and unsolicited.

Meanwhile, the issue of race permeates the book in a very interesting way.  Readers are exposed to several aspects of race in the South (though by no means all). We have Georgia's hugely racist and senile mother, who provides occasional comic relief through her forgetfulness, but often appalls reader's with her racist vitriol.  Then for part of the book we loosely follow (because Georgia rarely focuses on events outside herself) the successful fight to finally integrate the community of Six Points by annexing the nearby African American neighborhood.  Meanwhile, Georgia herself provides a look at interracial relationships through her high school fling with Skiff and the result.  Childress provides and interesting and varied insight that engages readers' in a much larger conversation.

Georgia herself is a difficult character to come to terms with as a reader; I found her to be an odd mixture of relatable and alien, sympathetic and reprehensible.  On the one hand, I can identify with her participation in and knowledge of Southern society, her love and expertise at cooking (aren't I modest today), her roll as a hostess, her sense of hospitality.  On the other hand, she has a lot of traits that are harder to identify with, such as her bouts of extreme selfishness and her slutty side that often eyes other people's husbands.  She's not very sympathatic when she reveals her mean side: a Southern "bless your heart" sort of insult, which has its place, but which seems to color every thought she has about other people.  At the same time, I felt sorry for her as she dealt, quite dutifully, with an aging mother with dementia and a spoiled, lay-about, criminal brother.  Georgia makes for an exciting read, since you're never quite sure what she's going to throw at you next, and it's not until the end that you come down firmly on her side (or at least, I did).

Overall, I enjoyed the novel quite a bit (I finished it in one day) and found it refreshing to branch out for a change.  Georgia Bottoms was an amusing mix of humor and drama in the South, and I highly recommend picking it up.

Extras
  • Check Mark Childress's website for more information about the author and his other writings. 
  • Check out this book discussion guide for Georgia Bottoms, which features the recipe for Coca-Cola Cake that will be the focus of my weekend food post.
  • And don't neglect Childress's Facebook page.