What You'll Need
Supplies
Cutting board Mixing bowl
Knife for chopping Mixing spoon
Sealable baggie Large cast iron skillet
Ingredients
2 6 oz cans white crab meat Salt and pepper to taste
3 green onions 30 Ritz crackers
1/2 Tbsp parsley flakes 3 Tbsp mayonnaise
3/4 tsp Old Bay Seasoning 1 cup olive oil
Now Let's Make Crab Cakes for Two!
Begin by opening and draining off all the water on your canned crab meat. Dump the crab meat into your large mixing bowl. Next, chop your green onions. The easiest way to do this is to line the onions up together and began chopping (it's really more of a half slicing, half chopping motion) at the green end until you get to the bottom of the onion that is all white. Discard the white parts. Scrape the green onion into your large mixing bowl.
Now, measure out 1/2 Tbsp parsley flakes and add them to the bowl. You can use a couple sprigs of chopped fresh parsley if you want; it's more colorful, but I didn't have any on hand. Measure out 3/4 tsp of Old Bay Seasoning and add it to the bowl. It must be Old Bay; anything else is just... wrong. Next, add salt and pepper to taste; I used maybe 1/2 tsp salt and 1 tsp black pepper. It definitely doesn't need more salt than that, but the pepper is pretty negotiable. Gently mix the ingredients together until you have a more uniform distribution.
 Now take your sealable baggie, put in about 10 ritz crackers, and seal the bag, carefully pressing out any air. Now smash (insert Hulk jokes into your cooking process now). This is the easiest, cleanest way to generate cracker crumbs. Using the baggie keeps crumbs from getting everywhere and prevents waste (/lecture). Add the crumbs to the bowl and repeat until all 30 crackers are crumbled.
Add 3 Tbsp of mayo and mix. You want a fairly even texture by the time your done mixing; no lumps, please. Once blended, divide the crab mixture into four even parts in the bowl. Refrigerate for about 5 minutes. Chilling the mixture makes it a little less gooey and more workable for the next step. Take this time to prepare any other dishes you're serving or set up some candles. (Romance, people, romance!)
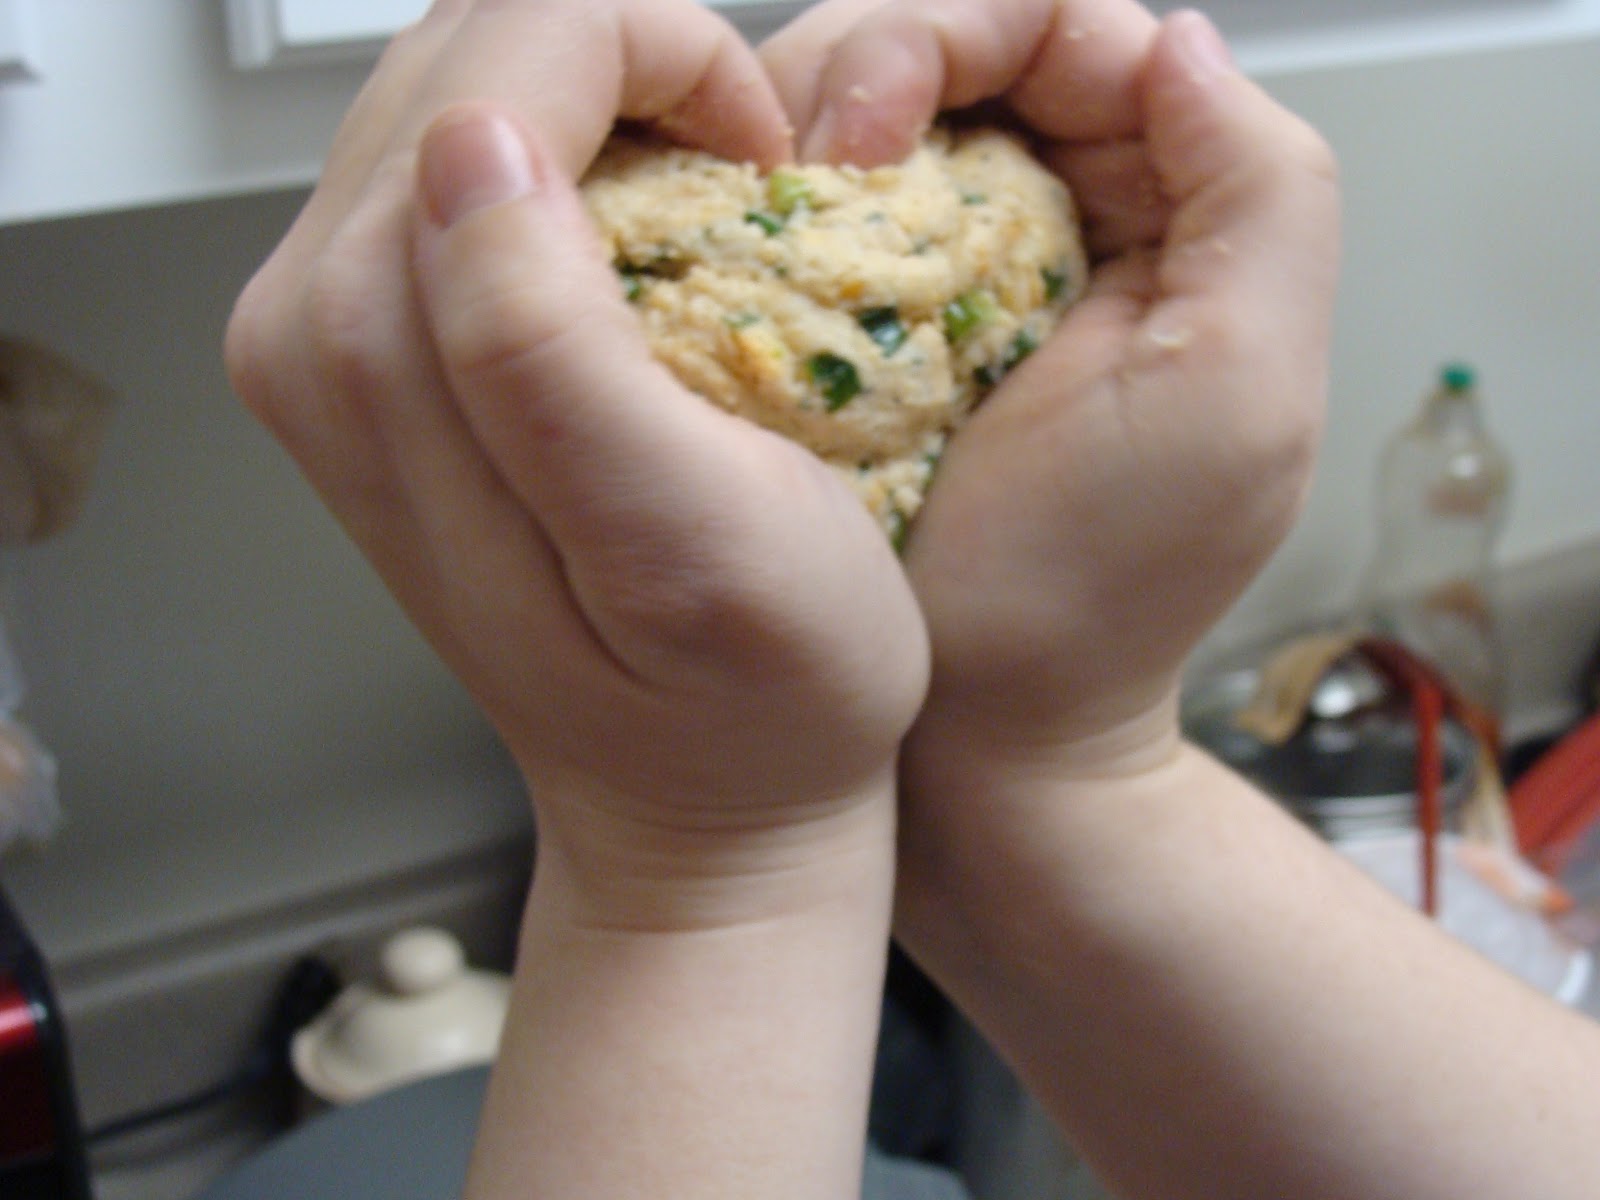
Remove the crab from the refrigerator. Take one of the four divided parts and roll it into a ball between your hands (clean hands, clean hands!). Squish the ball between your hands to flatten it. You want it fairly flat - about 3/4 of an inch thick. Now cradle the flattened crab cake in your hands so that the flat surfaces face out and your hands are around the thinner edge. (Okay, see the 2nd picture if I'm being confusing). Curl your fingers down to form a heart with your hands (and, incidentally, the crab cake). Flatten and repeat until you're satisfied with the shape of your heart shaped crab cake. Set aside and repeat this process for the remaining three.


Heat 1 cup of oil in your skillet over medium-high heat. Do not put the crab cakes in until the oil is hot enough, or you'll be steeping your cake in oil. (Mumph). How do you tell if your oil is hot enough? Well, for starters, don't touch it (that's a no brainer, right? RIGHT?). Just barely wet your fingers and then flick a very small amount of water off of them into the oil (maybe stand back a little, just in case). If it sizzles and pops, your oil is ready. Add all four crab cakes and cook on one side until it is dark brown. Flip and repeat. Remove from oil. Pat dry to remove excess oil if desired.
If you're not ready to serve your meal yet, the crab cakes respond well to being held warm in an oven. Serve with your choice of delicious sides under candlelight (and yes, the lack of candlelit romance will totally affect the flavor). The fettuccine tossed with the tiniest bit of alfredo seen here was particularly tasty paired with the crab cake. Also, while this is the first Crab Cake I've ever had that didn't need Tabasco sauce, it still pairs nicely with it if you can't resist.
Pin It
3 green onions 30 Ritz crackers
1/2 Tbsp parsley flakes 3 Tbsp mayonnaise
3/4 tsp Old Bay Seasoning 1 cup olive oil
Now Let's Make Crab Cakes for Two!
 |
| Watch the fingers! |
 |
| No need to be crabby. |
 Now take your sealable baggie, put in about 10 ritz crackers, and seal the bag, carefully pressing out any air. Now smash (insert Hulk jokes into your cooking process now). This is the easiest, cleanest way to generate cracker crumbs. Using the baggie keeps crumbs from getting everywhere and prevents waste (/lecture). Add the crumbs to the bowl and repeat until all 30 crackers are crumbled.
  |
| I know I said no lumps... |
Remove the crab from the refrigerator. Take one of the four divided parts and roll it into a ball between your hands (clean hands, clean hands!). Squish the ball between your hands to flatten it. You want it fairly flat - about 3/4 of an inch thick. Now cradle the flattened crab cake in your hands so that the flat surfaces face out and your hands are around the thinner edge. (Okay, see the 2nd picture if I'm being confusing). Curl your fingers down to form a heart with your hands (and, incidentally, the crab cake). Flatten and repeat until you're satisfied with the shape of your heart shaped crab cake. Set aside and repeat this process for the remaining three.

 |
| Ignore the irony. |
 |
| Who's an awesome girlfriend? This girl. |
 |
| My chocolates now. Happy Valentine's Day and stuff, hoomans. |


