Thursday, May 31, 2012

Plum Awesome

I've finally gotten around to reading another series I've been meaning to sink my teeth into.  A while back I reviewed Wicked Appetite by Janet Evanovich (The sequel is out this June.  Excited!), and it completely hooked me on Evanovich's writing style.  So, I figured I'd read Stephanie Plum next, who brought Evanovich success in the first place. I went in expecting to enjoy One for the Money, and I did. But the novel took all my other expectations, stomped on them a couple times, kicked them in the ribs, and showed me how much better it could really be.

The Basics
I've already told you a bit about Ms. Evanovich's writing in my previous post, but here's bit more about her for kicks.  Evanovich grew up in New Jersey; she was a second-generation American and the first in her family to attend college. She currently resides in New Hampshire with her husband, and according to her bio wants to be like Grandma Mazur when she grows up (read this first book and you'll see why).

One for the Money is the first book in the Stephanie Plum series, featuring none other than Stephanie Plum. Stephanie is a down on her luck ex-discount lingerie buyer from blue collar New Jersey.  While her mother thinks she needs a new husband, Stephanie knows she needs a job. Fortunately her reluctant and perverted cousin Vinnie is a bail bondsmen, and she blackmails him into taking her on as a bounty hunter. Her first target? Joe Morelli, a cop who skipped out on bail for murder.

The Book
Sadly I had already seen the movie before I read the book. Not that the movie wasn't enjoyable, but this is a mystery book, so I went in mostly knowing what happened. That being said, I'm really looking forward to the second book, when I can experience the mysterious part of the mystery.  Evanovich weaves a really good tale and lays all the investigative work out for her readers.  I can easily see myself solving things along with (and hopefully slightly ahead of) Stephanie. Evanovich creates nicely complex story lines with lots of interconnected details and red herring or two.

I also really liked her characters.  She crafts believable human beings with just the right hint of ridiculousness.  My favorite books are those that are full of humor, and the way Evanovich incorporates that humor is genius. Rather than stuffing her characters into bizarre and goofy situations to create humor, she makes the characters themselves funny.  It's the characters and their actions and reactions that make the story amusing.  So whether Stephanie hops the curb to run over the guy who kissed and told or Grandma Mazur adopting hot pink shorts as a new fashion statement, the hilarity arises mostly from the people. Not that situational humor doesn't have its place. Evanovich balances the funny parts so nicely that you'll always be laughing and never thinking "Oh, please."

Speaking of balance, don't think that One for the Money is all giggles; Evanovich really goes for the whole cannoli (I should learn to make those...).  One of the elements that surprised me once I got into the novel was how gritty the story could become.  My previous Evanovich experience was a little more light and fluffy and cupcake filled than this, where the only cupcake we get is Morelli's nickname for Stephanie (nope. Cupcakes. I should make cupcakes Sunday).  Evanovich doesn't shy away from the more realistic and dangerous side of Stephanie's new bounty hunter gig.  The book has its share of blood, bruises, and psychos, and it will get your heart pounding as you root for Stephanie and bite your nails until you see her come through it alive but not unscathed.

You can also tell that Evanovich has a really feel for the New Jersey setting of her series.  Since she grew up there, I'd hope so.  As Stephanie navigates Trenton, we get a real sense of life in Jersey. Evanovich incorporates everything: the landscape, the people, the mannerisms, the turns of phrase, the culture.  The book doesn't just have a New Jersey setting; I feel like I'm breathing the (decidedly questionable) air as I read.  It's the difference between "oh, neat, they're in New Jersey" and imagining that if you look out your window you'll discover you've been transported to the burg.

Evanovich offers a well-rounded reading experience that's sure to delight. And, I highly recommend that you pick up this series.  Start with One for the Money and go from there; you'll have plenty to keep you occupied, since she's already up to 18.

Extras
  • Head on over to the author's website for lots of fun information and especially check out her Stuff for Fans section.
  • So, you might have heard that the first book got a movie.  Sadly it was widely panned by the critics so there likely won't be a second. I thought it was cute and that critics didn't like it cause it's hard to classify. Just don't expect high art and you'll enjoy.
  • Check out this fun Stephanie Plum website that lets you visit the Burg and play games. What's not to love?
  • And lastly, a photo of Janet Evanovich with doggie for your viewing pleasure.
 

Sunday, May 27, 2012

A Memorial Day Feast

So, some you might have noticed I was absent for my usual book review post on Thursday.  That's because my kid brother graduated from High School.  Woot! Regularly scheduled programming will now resume.

I thought I'd do something that would fit in with tomorrow's holiday, so I came up with this recipe for Memorial Day Sliders.  I've made hamburgers aplenty, but I'd never done sliders (a term my mom insists sounds kinda gross; no comments from the peanut gallery).  I was using King's Hawaiian rolls, so I wanted something with a hint of sweet tang to go with them.  This is what I came up with, and they were delicious.  This recipe makes 8 sliders, and can easily be multiplied to serve a larger number.

What You'll Need
Supplies
Large mixing bowl                                                            Knife for slicing
Large skillet                                                                      Paper towels
Spatula                                                                              2 plates
Cutting Board
Ingredients
1 lb lean hamburger meat                                                 1/4 cup plain breadcrumbs*
1 large egg, cold                                                                Olive oil
2 Tbsp Hoisin sauce                                                         King's Hawaiian rolls
5 shakes Worcestershire sauce                                        Toppings of choice

Now Let's Make Memorial Day Sliders!
Click for a tasty slideshow!
Place your hamburger meat in the large mixing bowl.  Crack 1 large egg and add it to the bowl, avoiding any shell (I find that this helps the meat stick together better if the egg is still cold rather than room temperature).  Measure and add 2 Tbsp of Hoisin sauce.  If you don't have/ can't find Hoisin sauce you can also use a sweet Teriyaki sauce like La Choy; the key is to use something tangy with a slight sweetness to it. Then add five shakes of Worcestershire sauce.

Measure out 1/4 cup of bread crumbs and set to the side. Now comes the gross the part (also prepare yourself for some painfully cold hands).  Get your hands in there and start squishing everything together until it's thoroughly mixed. There's just no other way to do this; a spoon doesn't cut it (though I suppose you could use gloves if it really bothered you). Once everything is mixed together, add the 1/4 cup bread crumbs and immediately place that measuring cup in the sink (since you just got your meaty hands all over it).  Mix the bread crumbs in by hand, also.

Divide the meat into about 8 even sized piles (I was going to say chunks, but that sounds a little gross, yes?).  Take one pile and squeeze it together to make sure that it will stick. Using both hands, roll the meat into a ball, then flatten it between your palms.  The slider should be a size that fits within the palm of your hand and should look a little bigger than you actually want it to be, since it will shrink while cooking. Place the patty on one of your two plates and repeat this step for the rest of the meat.

Wash your hands (you made need someone to turn on water and squirt you with soap to avoid getting meat everywhere. Safety first!). Pour enough olive oil into your pan to easily cover the base of the skillet.  If you have a grill, you can skip this and the next step and grill that tasty, tasty meat, but you're on your own (having never yet owned one, grilling is not my forte).  Heat the oil at medium heat, about 5 or 6. 

Once the oil is hot enough, add all eight of your sliders to the pan. If your pan's not big enough to do all eight, I recommend cooking them in batches of four.  Spread them around the pan evenly to start with, since you don't want the sides of the burgers to try and stick together. However, once the burgers have started to cook and sizzle for a bit, you'll want to move them all as close to the center of the pan as possible to allow them to cook evenly.

While your burgers are cooking, start prepping your topping choices.  Me? I like onions, tomatoes, lettuce, and cheese.  Sadly, the tomatoes at the supermarket looked downright mealy, so I had to pass on them this go round. Le sigh.  Keep the size of your sliders in mind for your toppings, I chose a smaller sized onion and sliced it very thinly to achieve a perfect fit for my sliders, and the same thing goes for any other topping.  At a loss? Here are some suggestions: onions, tomatoes, lettuce, cheese, mushrooms, bacon, pickles, red onion, avocado, basil leaves, toasted garlic, red peppers, jalapenos, relish, salsa, etc. And don't forget our old friends: ketchup, mayo, and mustard!

At some point when you're prepping all your delicious toppings, the burgers should be ready to flip.  The side that was facing down should be dark brown all over with some darker, more cooked spots.  Flip all the burgers and allow the other side to reach the same level of doneness. Naturally, you'll want to watch your burgers to achieve the level of doneness that you prefer. I like mine medium well, so that's what you should get if you follow my instructions precisely. If you like yours a little more or a little less done, you'll have to play with cooking time to adjust.

Take your other plate (the clean one that you did not have raw meat on), and place two layers of paper towels on it. Remove the burgers when they are done and place them in one layer on the plate.  Take some more paper towels, and pat the burgers to remove the excess grease.  I don't really like any extra grease, but I suppose you could skip this step. However, I find that due to the size of sliders, they can't handle the extra grease as easily a larger burger.

Serve the sliders on King's Hawaiian rolls with the toppings and sides of your choice. Chow down, enjoy, and send kind thoughts to those who can't be home having fun grill-fests this Memorial Day. (Miss you Michelle!)


I've been cat-sitting for a friend who's in Air Force Basic Training. Everybody, meet Sebastian's new friend Kat:

Forget polite questions.
GIVE me your cheeseburger, hooman!


Sunday, May 20, 2012

It's a Brownie Kind of Day

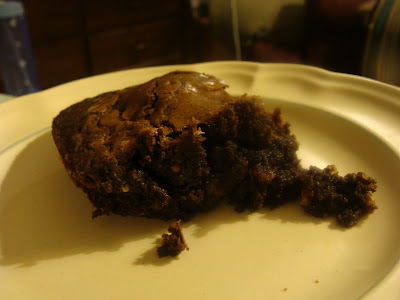
I haven't baked anything in a while, have I? I thought it was about time, and what's better than a chocolaty  brownie? (Nothing, that's what).  This is a recipe for a basic brownie that I threw together after some experimentation.  It gets a nice crust around the edges (totally the best part, right?) and stays nice and moist on the inside. I don't like fudgy brownies, myself, so these hover somewhere between fudgy and cake-like. If you like yours even more cake-like, add an extra egg.

What You'll Need
Supplies
Large mixing bowl                                                          Measuring cups
Small mixing bowl                                                           Measuring spoons
Mixing spoon                                                                   13 x 9 inch casserole dish
Whisk                                                                              Cooking spray
Butter knife
Ingredients
2 sticks butter                                                                  2/3 cup cocoa powder
1 cup sugar                                                                      1 cup flour
1 cup light brown sugar                                                  1/2 tsp salt
4 eggs                                                                              1/2 tsp baking powder
2 tsp vanilla

Now Let's Make Brownies!
Start by preheating your oven to 350F.

Mmmm, buttah!
Unwrap your two sticks of butter (that's 8 oz or 1 cup in case you were wondering) and cut them into pieces into your large mixing bowl. Place the bowl in the microwave and melt the butter. About 45 - 60 seconds should do the trick; just watch it carefully and remove it if it starts making popping noises. Set aside.

Crack four eggs into the small mixing bowl. Remove any stray shell and whisk the eggs together until the yolks and the whites are blended. Add the eggs to the butter.  Measure 1 cup of sugar and add it to the butter.  Next, measure 1 cup of light brown sugar, making sure to pack the sugar into the measuring cup; add it to the butter.  Take your spoon and mix the butter, eggs, and sugars together until they are completely blended. The eggs will resist slightly, but you don't want any areas where the ingredients are still separated (put those eggs in their place).

 Click photos to enlarge!

Measure 2/3 cup of cocoa powder, 1 cup flour, 1/2 tsp salt and 1/2 tsp baking powder, adding each to the large bowl as you go.  Mix the ingredients together thoroughly. When you're done check for pockets of dry ingredients; no one likes lumpy brownies. This is also your chance to add any additional ingredients you might want to the brownies. I recommend 1 cup of any of the following: chocolate chips, butterscotch chips, walnuts, pecans.  (Whatever tickles your fancy, really).

 Seriously, click! Who doesn't want a Brownie slideshow?

Prepare your baking pan or casserole dish by spraying it with cooking spray.  Make sure to get the sides as well.  Spoon the batter into the pan, making sure to scrape as much of the batter off the sides of the bowl as possible.  Since the batter is so thick, use the back of your mixing spoon to spread it evenly around the casserole dish. 

Bake at 350F for about 30 - 35 minutes. Mine are always done right between those two numbers.  Test the brownies doneness by inserting your butter knife into the center of the brownies. If the knife come out clean, you're good to go. If not, give the brownies a few more minutes.  You don't want to overcook your brownies (cause tough, burnt brownies are just not tasty), but you don't want to stab them to death either, so use moderation when checking.  Remove and allow brownies to cool before cutting them into squares. Serve and enjoy!

Sorry, the lighting is nonexistent in my living room.


Thursday, May 17, 2012

Dead in the Water

So, as you know, I'm a sucker for a good series.  I've long been a fan of the Sookie Stackhouse Southern Vampire Mysteries in particular (I'll be keeping mum on the TV series, though.  Alan Ball *shakes fist*).  The latest installment was released at the beginning of the month, and naturally I got my hands on it as soon as I realized.

The Basics
Harris, Charlaine. Deadlocked. New York: Ace Books, 2012. eBook.

Born and raised in the South, Charlaine Harris has been writing for over thirty years.  She's the author of several series, including the Sookie Stackhouse mysteries.  She recently announced that Deadlocked would be the penultimate novel in the series, so that she could move on to other projects, including a graphic novel.

I'm going to jump straight in here, so if you aren't already familiar with the series, I suggest you head over to the Wikipedia page for Dead until Dark, the first novel in the series. Deadlocked finds our heroine, Sookie, in some dire relationship straits (what's new).  Her relationship with boyfriend Eric is cooling down, her friendship with Sam is threatened by his psychotic girlfriend, and her fairy relatives are causing all sorts of stress.  Yeah, that about sums it up really.

The Book
To begin with the beginning, I found this novel really difficult to get into.  It had a very slow start. Typically, I pick up a Sookie book and I jump in and don't put the book down again until I'm done.  Harris is usually very good at hooking her audience.  Maybe it was the club setting or the hanging out with gal pals at the beginning; those haven't really been staples of Sookie's life throughout the books. Moreover, nothing in the previous books led me to believe that Sookie was particularly close with any of these women; not the level implied in the opening chapter. She's friendly with them yes, but other than Tara, I felt this was a bit out of left field.  

That being said, once the book got going and I was able to fully engage, I devoured the novel at my usual pace. I liked what Harris did with the plot and I liked that the mystery was a bit more at the forefront of this book.  The past few novels in the series have highlighted the crazy supernatural world and Sookie's love life more than any actual mystery.  But this time, Harris had me guessing for a while, and it reminded me a bit of the earlier novels in that sense.  I also think Harris did a fairly good job setting the groundwork for the direction of the final novel in the series.  She certainly left me wanting more and excited to know what happens next.  

While this book had some vampire infested bits, they seemed more like token vampire moments. Most of the novel was taken up with fairy shenanigans with a splash of shapeshifter politics.  There's nothing wrong with that, but I miss my vampires.  I know vampires are a bit overdone, nowadays, but back when they weren't I loved this series and the world it created. It's one of the few places I come to get a vampire fix, so I want that filled please.  I hope that the last book spends a bit more time with our vampy friends.

So, overall it was mixed bag for this book.  I definitely enjoyed reading it, but it wasn't Harris's best.  I suppose that I'm glad she's ending things soon. It feels like its time, and it's best to get it done before things start to get stale.  It'll be nice to have the complete run and see the full picture.  I think the first few novels will always be my favorites, but this one was a decent installment.  

Extras
  • As per usual, check out the author's website. Harris frequently posts a chapter from her upcoming books, which is great fun.
  • She has a Sookieverse themed online game, which is kinda cool: Dying for Daylight.
  • And, I suppose you can google the TV show. (grumble)
   

Sunday, May 13, 2012

A Pork Choppy Mother's Day

So, it's Mother's Day (hope you didn't forget!). Why not make your mother something nice for Mother's Day this evening?  Sure, going out to a fancy restaurant for a meal is nice, but why not avoid the crowds and impress your mom with a more personal dinner.  Really, any recipe would do, but these Honey-Garlic Pork Chops are particularly tasty and sure to please. (Unless of course, you're the burn the house down type, in which case Mom might prefer that dinner out.  Just saying).

What You'll Need
Supplies
Plate                                                                                 Measuring spoons
Fork                                                                                  Large cast iron skillet
Small bowl                                                                        Spatula
Measuring cups (liquid and dry)
Ingredients
1 cup of plain bread crumbs                                         2 Tbsp mustard
2 Tbsp flour                                                                      2 tsp minced garlic
Salt and pepper                                                                 2 big forkfuls honey
1 tsp thyme                                                                       4-6 center cut pork chops
1 egg                                                                                 1 cup olive oil

Now Let's Make Honey-Garlic Pork Chops!
Measure 1 cup of plain bread crumbs, and pour them onto your plate.  Add 2 Tbsp of flour, a sprinkle of salt, pepper to taste, and 1 tsp thyme.  Use your fork to mix the ingredients together until they are thoroughly blended.  The fork helps avoid spills, but don't be too vigorous, or you'll slop crumbs off your plate.  You likely won't be using the full amount, but depending on how much you coat your chops, it's better to be safe.  Set aside.

In your small bowl, crack a large egg. If you get shell in the bowl, lightly wet your fingers to easily pull the shell out (that way you don't have to chase the shell around the bowl). Now, measure and add 2 Tbsp mustard and 2 tsp minced garlic.  Take your fork and wipe off any clinging bread crumbs.  Use this to spoon (oh the irony) out some honey.  You want as large a forkful as you can manage per scoop. Allow the first scoop to pour off the fork into the bowl; on the second scoop simply stick your fork in the bowl. Use the fork to whisk together all the ingredients until everything is thoroughly blended (especially the egg).  The garlic may sink to the bottom, but the rest of the ingredients should not be individually identifiable.


Measure and pour 1 cup of olive oil into your large skillet.  Set the skillet on the stove and turn the eye to medium high heat.  While your oil is heating, move on to the next step.

It's time to dredge those pork chops! This is messy and your hands will get a little gross, so prepare yourself.  Take a pork chop and dip it into the bowl of garlic/honey/egg.  Move it around the bowl until all of the pork chop is well coated in the mixture.  Hold it over the bowl to let it drip for a second, then quickly lay the chop on the plate of breading.

Press the pork chop down into the breading repeatedly, moving your fingers all over the pork chop to coat one side. Flip the chop and repeat.  Make sure to coat the entire pork chop. If there are any bare spots, use your fingers to press breading onto them. Set the pork chop aside and repeat for the remaining chops.


By now your oil should be ready. If you're not sure, wet your fingers and flick a small amount of water into the oil. If this causes the oil to pop, it's good to go.  Gently place your pork chops into the pan.  Depending on the size of the chops and the pan that you're using, you may be able to fit more than the two pictured here. If you have to, you can place the cooked pork chops on a plate in the oven at warm until the rest are ready.

Cook on one side until the pork chops begin to turn a very dark golden brown.  You'll know that they're getting close, when you start to see signs of crisping around the edges and sides of the pork chop.  When ready, gently flip the pork chop using a spatula.  Cook on the other side until matching in color.  Make sure to cut into the pork chops to check that they're done; you don't want to serve Mom pink or bloody meat (there is no medium rare in pork; go for well done).  When done, remove from pan and repeat these cooking steps for the other pork chops.

Serve with a plateful of mashed potatoes and green beans and a side salad for a complete meal. And don't forget the present (it is Mother's Day after all).


Thursday, May 10, 2012

In Memoriam

As I'm sure everyone knows by now, author and illustrator Maurice Sendak passed away this week.  I loved his books and illustrations as a child, and I still have my copies carefully stored away to await my own children someday.  There's something about the topics Sendak covers and the way he illustrates them that has always sparked my (and countless others') imagination.  I think it's quite telling that even as an adult I can read one of his books and still get a sense of enjoyment out of them.

The Basics
Maurice Sendak was born in Brookyn, New York in 1928 to Jewish parents and decided on his career as an illustrator after seeing Disney's Fantasia.  In 1963, he published Where the Wild Things Are and rose to international fame.  He published In the Night Kitchen in 1970, which garnered criticism for its illustrations of a little boy in the nude and remains one of the most frequently banned books today.  In 1981 he published Outside Over There, and he has illustrated countless other books.

The Books
So, I'm not going to talk about Where the Wild Things Are. I think everyone is pretty familiar with that particular book, and it's a bit overplayed of late.  Also, of his three best known works, it's my least favorite  (I know, I'm weird).

Instead, let's start with In the Night Kitchen.  Despite the hype surrounding the book's "scandalous" content, I've always really liked the book. And if someone finds the milk bottle to be phallic, I think they have larger issues than the content of this book. Just saying.  I assure you the book did me no damage, and I grew up to be a relatively well-adjusted human being (though I'm sure there's a few people who could debate that, too).

But, I don't really want to talk about the controversy surrounding the book.  The book is about a boy named Mickey who, after going to bed, enters into surreal and dreamlike world of the Night Kitchen where he becomes involved in the process of baking the morning cake.  As a child I loved the idea of being transported someplace else after I went to bed.  I liked the how much bigger the surroundings were than the little boy; it appealed to my child's sense of size and proportion. And I especially liked the dough airplane; I mean, what kid doesn't want to fly their own airplane (barring severe cases of acrophobia, of course).  The book has cute illustrations and a fun story on a topic many children are curious about (bedtime! oh noes), which makes it a great bedtime story.

My favorite Sendak book, however, is Outside Over There, maybe because it appealed to a lot of what I felt as a big sister. In the book, Ida is left to care for her younger sister, for whom she harbors some of the usual sibling feelings of jealousy. While Ida isn't paying attention, goblins come and kidnap her little sister, and she embarks on a rescue journey. Along the way, she is distracted by the magic of her surroundings, but ultimately her love for her sister wins out and Ida rescues her.

This book's illustrations were always particularly fascinating to me, from the setting and the rosy faced, large eyed children to the hooded and robed goblins.  I liked the idea of crawling out my window and discovering a magical garden-like realm on the other side.  It's great for kids with siblings, because it introduces the idea that a) their feelings of resentment are okay and b) that despite those feelings, they can still care for their siblings.

Extras
  • A very good article about Maurice Sendak following his passing can be found over at the New York Times.


Sunday, May 6, 2012

Super-easy Sunday: Salsa!

In honor of the most recent Cinco de Mayo and thanks to the fact that I'm feeling decidedly lazy today, I give you my super-easy recipe for salsa.  This recipe tastes just as delicious as homemade fresh salsa, but doesn't take nearly as much effort.  To top it off, it's so tasty no one will ever guess how easy it is.

What You'll Need
Supplies
1 large bowl                                                                   Knife for chopping
Can opener                                                                     Measuring spoons
Cutting board                                                                 Mixing spoon
Ingredients
1 24 oz jar of salsa                                                        Cilantro
1 14.5 oz can of diced tomatoes                                    1 tsp minced garlic
1 10 oz can Rotel                                                           Tortilla chips

Now Let's Make Salsa!
Careful, it splatters.
Open your jar of salsa and pour it into the large bowl.  Use your spoon to scrape the sides of the jar, making sure to get all that tomatoey goodness.  I usually use mild Pace salsa (because I'm a total baby when it comes to spiciness), but any salsa should do. So, use your favorite!

Open the can of diced tomatoes and the can of Rotel.  Do NOT drain the liquid from either. Add both cans, liquid and all, to the bowl of salsa.  Again, I like to use mild Rotel, and an off-brand could work just as well.  Stir everything together until you've got a fairly even blend.


Take your cutting board and knife, begin chopping your fresh cilantro. You don't want to do too much, as it can overpower the rest of the flavors in the salsa. I usually chop until I've got a handful.  To chop the cilantro, gather the leaves in as tight a bunch as you can. Hold the leaves together with one hand and, starting at the leafy end, chop the cilantro until you've gotten enough. I usually cut cilantro fresh from my herb garden, but if you're using store bought, make sure to wash it thoroughly first as it tends to be gritty. Add the chopped cilantro to the salsa bowl.  Measure 1 tsp of minced garlic and add it to the salsa. Mix thoroughly until you've achieved an even blend.


Chill in the refrigerator until cold enough to serve. I like my salsa cold, but you might not so follow your preferences.  Serve with tortilla chips and impress your friends!

Yeah, that's right. Nom!


Thursday, May 3, 2012

Cooking the Books: The Great Chicken Cookbook

Well, I try not to cook my books most of the time, but that doesn't save them from splatters and stains. For a blog that mixes cooking and books, I've been truly remiss for not including any cookbooks in my weekly books reviews.  I know, cookbooks aren't usually something you sit down and read (or so I've been told, but I already knew I was weird).  Nevertheless, knowing which cookbooks are worth having around is valuable information, especially given the hefty price tags some cookbooks carry.

The Basics
The Great Chicken Cookbook. Ultimo, Australia: Reader's Digest, 2010. Print.

Gosh, what to say? This is a book about chicken.  Chicken is a tasty, tasty bird. This cookbook promises over 230 recipes that will appeal to a wide variety of tastes.  It claims to have easy-to-follow cooking instructions, as well as indicating cooking and prep times and labeling low fat and quick meals.  So, does it live up to the hype and achieve true greatness?

The (Cook)book
Yes, to make a long story short, it does.  But, let me give you some specifics.

Pick this book up and give it a quick flip through, and you'll soon realize that it has excellent photographs and lots of them.  This is a must have in a cookbook for me. I want to see what I'm making before I go to the trouble of cooking it.  I don't need a photo for every single recipe, but I do want an abundance. I mean, what if you get super-excited and cook a nifty looking recipe only to discover that it both looks and taste like... well, something not so pleasant.  Admittedly, pictures only assure me of the looks side of things, but for me that's part of the joy of preparing and consuming food.

While usually, I'm kind of meh on the introductory section to cookbooks, this one has a great one.  It details how to skin and bone the various parts of a chicken as well as how to cut a whole chicken into parts. This is super-useful and very cost effective, since buying boneless, skinless chicken breasts, etc, costs much, much more than doing it yourself. Even better? The book provides clear photos for each step of the process with detailed directions.  This section also contains some very useful and important information on the safe storage, handling and disposal of raw chicken (Salmonella is not your friend, even if it offers you candy).

Now, let's get down to the recipes.  The cookbook does indeed offer a huge variety, with various ethnic influences.  I like the Curried Chicken Turnovers (p30), Quick Chicken Laksa (69), Chicken with Orange Sauce (100), Chicken Braised in Red Wine (124), Mustard-Tarragon Chicken Saute (139), and Lemon-Basil Chicken with Pita Pockets (306).  And those are just the ones I've gotten to so far. Each recipe indicates number of servings (the only time that gets confusing is on some of the appetizers), and nutrition information. I especially like the latter, since I want to know if what I'm putting in my mouth is a day's worth of calories.  While most of the recipes were fairly light, some weren't, so pay attention. Most were middle of the road, and you wouldn't want to pair them with any heavily caloric sides (but you were going to eat green stuff, anyway, right?).

While most cookbooks I recommend borrowing from your local library (they'll be in the 641's in Nonfiction), this one is actually worth owning.  If chicken is a routine protein in your household, this cookbook will help you get some variety and extra mileage.  None of the recipes seem overly complex, which makes the book ideal for the savvy and not-so-savvy cook alike.  Best of all, it's not particularly expensive.  The original hardcover was $24.95 and I recently saw it online for as little as $6.99.  It's well-worth the money.