What You'll Need
Supplies
2 pie plates 1 knife for slicing
1 peeler 1 large bowl
1 cutting board
Ingredients
6-7 apples All-purpose flour
4 pie crusts (that's two boxes of pre-made) Brown sugar
Ground cinnamon
Now Let's Make Apple Pie
 |
| Neat and trim |
Preheat the oven to 350F. Line each pie plate with a crust, making sure that it fits perfectly against the bottom and sides of the dish. Trim off any excess crust that hangs past the edge of the plate. You can save this if you have a recipe that enables you to use it immediately (like a fruit turnover if you have extra apple or other fruit), you could save it for a decorative finishing touch, or if there's not very much, you can toss it. Put the crusts into the oven for a about 9 minutes, until they are just barely cooked: no longer raw, but no where near brown. A note about the crusts, for this go round, I used boxed crusts, because I was 1) feeling lazy and 2) didn't have the time to make them from scratch. You may either make the crusts from scratch or buy them from the grocery, just make sure you have enough for two bottom crusts and two top crusts. If you choose boxed crusts, get Pillsbury, they're only a few cents more and the off-brand doesn't brown properly. (and we can't have subpar pie floating around)
 |
| Golden Delicious and Winesap |
Once the crusts are done, set them aside to cool. Now comes the labor intensive part: prepping all those apples. The ratio is about 3 to 3.5 apples per pie, and this recipe makes two pies. You want to choose at least two different apple types that are excellent for baking purposes, so that's about three of each type. This time I used Golden Delicious and Winesap; these apples are good for both baking and eating (so I know any extras will get nommed instead of wasted). This combination gets a nice sweet apple pie, if you want a tarter pie I recommend using a Granny Smith as one of your apples.
 |
| Peeeeeeeel |
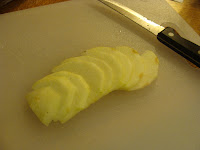
Using your peeler, peel each apple thoroughly. I like to do this sitting in front of a good show with a plastic sack for peels in my lap, but that's just me. I like to do the next steps in the apple prep one apple at a time. On the cutting board, quarter each apple and then slice off the part of the core that is on each quarter. Then, place each quarter so that it can stably lay on one of its sides and thinly slice up the apple. Place the sliced apples in your large bowl as necessary to clear room on the cutting board. Repeat this process for each apple, and make sure to fend off any apple-loving cats while you're at it.
 |  |
 |
| Final layer with brown sugar |
Now it's time to create the lattice-work top crust; you'll want to do this one pie at a time. Take the top crust and roll it out over your cutting board. Slice the crust into long strips that are about 3/4 of an inch wide. Place strips less than an inch apart going across the pie one way. Seal the strips along on side of the pie, leaving the other end of the strips unsealed. Peal them back. One at a time, add strips that travel across the pie perpendicularly to the other strips. Seal the strip to one side and then weave this strip in as you lay it across the pie by alternately laying the peeled back strips either under or over the strip you're working with. When you reach the other side, seal the strip your working with (both sides should be sealed) and peel back the other strips again. Repeat, spacing your strips a little less than an inch apart until you reach the other side of the pie. Seal the pealed back strips to their side of the pie. Fold any excess crust from the strips along the inner edge of the pie and then seal the entire edge using a fork. (Now would be the time to add any other decorative flourishes you might have planned)
Bake the pies at 350F for about 30 - 40 minutes, until the crusts are golden brown. Let cool a bit, then slice and serve warm with whipped cream or vanilla ice cream (or both!)
 |  |
 |
| Mmmmm... pie! |
And, just for a little fun (also he's threatened me with claw-filled violence if I don't), here is some photographic evidence of my cat's obsession with apples.
Follow @TheBookPantry


No comments:
Post a Comment
You know you want to . . .